Pages

Sunday, 30 December 2012

Always Biting Off More Than I Can Chew; Part IV

I went to Hudson yesterday to work on the log house.  I finally feel like I made a dent in the sanding that needs to be done.  I am going to go over the logs again, but this is step one.  You can really see the difference between original and sanded. 


This is such a dirty job, I was wearing coveralls, which I took off outside, and shook them out before I could get in the car to come home.


I have a thick layer of dust on everything!  I need a ladder to get the higher logs.


So far to go, but it's a good start!


First Lesson In Fibreglass; how to fix a fibreglass sleigh

Fibreglass manufacturing is part of my family history.  When I was growing up my Uncle manufactured fibreglass boats and snowmobile sleighs.  Although I have seen it done throughout my life, I decided it was time I tried my hand at it.  My cousin Dave (seen previously pushing down trees at my log cabin) still repairs things now and then.  I asked him to give me a call next time he was working on something.  A couple of weeks ago he did just that and I went over to his shop in the evening for a lesson.  This is what I learned.

It is very important to prepare the piece that needs to be repaired,  He used a grinder to roughen up the area to be repaired.


Cut out your fibreglass and have it ready.


Mix the hardener into the resin.


Brush on the first layer of resin.


Lay the fibreglass onto the resin and dab on a lot of resin, making sure you leave no air bubbles.


The fibreglass must be thoroughly soaked.


After it hardened, he hand sanded the patches, painted the sleigh, and put the runners back on.  And that, people, is what I did on my Christmas Vacation, :)


Tuesday, 18 December 2012

How to Make a Christmas Wreath, Cedar

Last week Johnny gathered some Cedar boughs for me while he was out trimming up one of his many snowmobile trails.  He was going to get me some Spruce and Balsam branches to, but never got around to it. Luckily he got me a pretty good pile of Cedar and I was able to make this rather large wreath.


I snipped the branches to 12 - 16 inches.  I gathered several bundle together, making little bouquets.  The wire wreath form is 14".


I had my usual company in the garage that night (Zima), 


but also had extra company, Sterling.  Really, I guess you could say that he had my company, since he regularly spends his evenings in there, and I don't.


I used baler twine to wrap the branch bouquets to the wire frame, because we have tonnes of this stuff, if you need some, give me a call.  For my local readers, you can purchase the wire wreath form at Cheers! just tell Lesley I sent you ;)


 When you get to the last bundle, just lift the ends of the first bundle and tuck the final bundle under it, wrap it, and tie it down.  I tied a little loop at the back, which you may or may not need depending on your wreath hanger.  It looks pretty big and wild right now, so I will trim it to get it a little more into control.


This is what the back looks like when you are done.  It looks like I used 9 to 10 bundles, if you used shorter bundles you would probably need more.


Here it is, trimmed up.

 I looked through my many ornaments but couldn't find anything suitable to finish this wreath, so I picked up a few ornaments while I was in Duluth this weekend.  I simply folded wire pieces in half like a floral pick and twisted the around the branches where I found it appealing.  I made and attached the bow, and voila, a Christmas wreath.


I may be making another one with mixed evergreen branches, if I do, I will add a pic to this post.

Monday, 17 December 2012

How To Make A Weathered Sign With Chalk Paint and Silhouette Cameo


I bought a few cupboard doors at the Restore, I love that place!  Unfortunately the closest one to my town is four hours away :(
I brushed some homemade chalk paint onto it, and then just brushed it out until it was evenly coated, but wasn't solidly covered.


After it dried I lightly sanded the edges to distress it just a little more.  I cut out a large "Believe" with my silhouette cameo (I had to take a quick lesson from my son because he is the master on that thing!  He has used it far more than I have.).


 Now that I was at this point, I wasn't sure which direction to take.  It seemed kind of pointless.  I made the knobs (check out the tutorial here http://libler.blogspot.ca/2012/12/how-to-make-dollar-store-drawer-pull.html ) and hung the stockings on it.


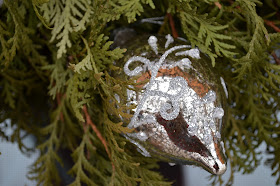
For another look, I  hung these beautiful Christmas ornaments on it.  I will definitely be making more signs in the future.


Monday2 Make the Scene Monday #53
DIY Show Off
My Uncommon Slice of Suburbia

How to Make a Dollar Store Drawer Pull


Well people, I am way too proud of myself for this one, yup, giving myself a little pat on the back. You know the saying, "Pride goeth before the fall", yeah, so I'm sure I will pay for this one.  All jokes aside, if you have a drill press, you gotta try this.  I was in Dollarama and came across a little bling.


I had an idea, but didn't think it would work, I bought them anyway because I figured even if the idea didn't work, a girl can't have too much bling around can she?  I was in the States this weekend and picked up some metal screws at Walmart.  Well, my idea worked, and I couldn't be more pleased.  I made plastic bling  into drawer pulls.

I used Manuel's drill press (don't try this without one). Insert the bit into the drill press as far as possible so that it will not flex as easily.  The drill bit I used was just slightly smaller than the screw I was using so that when I inserted the screw into the knob the threads would cut into the plastic a little so that it gripped and didn't slide off.

I centred carefully, and went very slowly because when I tried to go too fast it would wander off to the side and drill a crooked hole.  The drill bit would plug up with plastic, it melted the plastic as I drilled, but every couple of knobs I either drilled a piece of wood, or took the bit out and laid it on the cement floor and gently hit it with a hammer and the plastic would break off.


The knob looks a little different after it is drilled because the whole that is drilled reflects in each facet of the knob.   In the picture above the finished knob is on the left, see how there is more detail in the reflection.


I'm not sure how long these would hold up on a dresser or something that is being used constantly, but so often a drawer pull is just for looks anyway, and seriously, these cost a few pennies each to make.  Go ahead, bling it up people, don't be shy, and don't spend a mint!  This is how I used the first ones off the press, the drill press that is, ha ha, check it out Chalk Paint Sign


Monday2 Make the Scene Monday #53Home Stories A2ZBecolorful
         
DIY Show Off
My Uncommon Slice of Suburbia

Wednesday, 12 December 2012

Christmas Fudge


I call this Christmas Fudge because that is the only time I make it. Funny how I can do without it the rest of the year, but it is a necessity this time of the year. This is the easiest fudge you will ever make, well, I wouldn't know that for sure because it is the "only" fudge I have ever made. One of my favourite childhood memories is when my Dad would say "Who's going to go out and get some snow so I can make some fudge?" Believe me, there were always volunteers. Maybe that is one of the reasons it seems like a winter treat to me. It's funny because my Dad did no baking or cooking of any kind, but he did make fudge. This is not my Father's fudge, but it is no-fail.
These are the ingredients, well, except for 1 cup of icing sugar, I forgot to put that in the picture.


Ingredients:
3 cups chocolate chips
1 can sweetened condensed milk
1 cup icing sugar
any thing else you want to add, I added:
1 cup chopped pecans
1 cup cranberries

I used to make this in a double boiler, but I'm all about the convenience these days, and if Manuel doesn't want to eat them because I used the microwave, then he just doesn't have to.
I put the milk and chocolate chips in a glass bowl and microwave for 2.5 minutes.
I stir it until smooth and glossy, then sift the icing sugar into it and mix it up until it is well combined.  At this time you are either done, or you can add whatever your little heart desires.  I line and 8 X 8 pan with wax paper and pack it in, smoothing as well as possible.


 I made a pan of plain and a pan with cranberries and pecans.