Pages

Sunday, 24 November 2013

Always Biting Off More Than I Can Chew; Part VII; Some Before And Afters


Here are some before and afters, or in some cases before and durings :)

Porch


There was a smell in the porch, so I tore out the gyproc, the floor, and eventually tore down the ceiling.


Then I put it all back together again.


I whitewashed the walls,


and added a closet.  Unfortunately the closet doors will have to wait.


Oh, and don't forget about the floor.
I have since added the trim, but forgot to take a new pic.


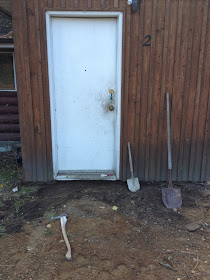
Here is what the property looked like before,


and now!  The right side is done, the left side will have to wait until next year since we got a large dump of snow.


On to the bathroom.


Here is a panoramic of the bathroom part way through


Entrance from the outside.


Changed the light and the door.  I have trimmed the door too, but not when this was taken.


 Patchy flooring

 
 That's better


Loft before,


Panoramic of the loft, looks like a beehive, ha ha.  Sanded the logs and put new flooring down.


This is one of the bedrooms, just to show how much sawdust was produced in the sanding of the logs.


Right side stained, this was a big wall!


Attic full of squirrel nests, I never used to hate squirrels, now they are the enemy!


After I got the insulation cleaned out, but obviously before I put the new insulation in.  This was a big, messy, itchy job!


That's it for today.  I will post a few more later.

Friday, 22 November 2013

Antique Dresser Makeover


I can't believe I didn't take a before picture of this dresser. Well, what can I say, it was brown with a worn finish and the handles were dull and scratched brassy colour.  I did some sanding and priming.  In the picture below you can see the painted drawer on the left, and on the the drawer has been antiqued.  I love how the stain brings out the detail.


Here is the finished project. I spray painted the drawer pulls silver, although in this picture they kind of look white.


Wednesday, 13 November 2013

Reclaimed Wood Bathroom Vanity


I needed a vanity for the bathroom of the log house.  I wanted it to be unique, but also didn't want it to be too big.  I was unsure which way I wanted to go with it, then suddenly I had a plumber lined up, and needed it stat!  I cut all the pieces and put about half of it together one evening, then finished it the next day while the plumber was working on the rest of the bathroom.  I put a piece of plexiglas on the top and on the shelf to make it practical.


I love vessel sinks, but I didn't want to spend a large amount of money on the tall taps that are used with them.  I built the vanity with a step shelf at the back to make the tap higher. (I saw this done on somebody's blog but then couldn't find it again or I would link to it.)  There is no point getting a good deal on a sink if you have to pay way too much for the tap.


There is a crawl space under the cabin so the plumber put a straight pipe down through the floor and put the trap under the floor, making the lower shelf more usable.


Don't the logs looks great!  I do love this vanity, this is why I do all this hard work, so that I have total control of the decor.  I know I should have dressed it up with towels and props, but I couldn't wait to share!