Saturday, 27 October 2012

And Now For Something Completely Different; Baby Girl Quilts

Pin It

I started these two quilts a couple (or maybe 3) years ago.  They have been laying on my sewing table (you can tell it hasn't gotten much use lately) covered with plastic to keep them protected.  I find myself in need of a baby shower gift for a special little girl.  I know, they are all special, so true, but this one is special to me.  So I pulled them out and finished one up, so I thought I would show them to you.  I don't usually do this type of quilting, cut and paste quilting I call it, (I have only done one other besides these two) but I wanted a lot of detail and don't feel I have the time or patience to do this by hand.  I will show you my first cut and paste quilt in my next post.  I am quite proud of it.


This is not going to be a real tutorial I will just show you a couple of the steps required in the making of this type of quilt.  I made up the patterns for these quilts, just made it up as I went along.  I remember gathering my biggest bowls from the kitchen to make the circles.  Hey, I use what I have on hand :)

I ironed the fabric onto wunder under or something similar and cut out the shapes I wanted.  I then ironed the pieces onto a background fabric.


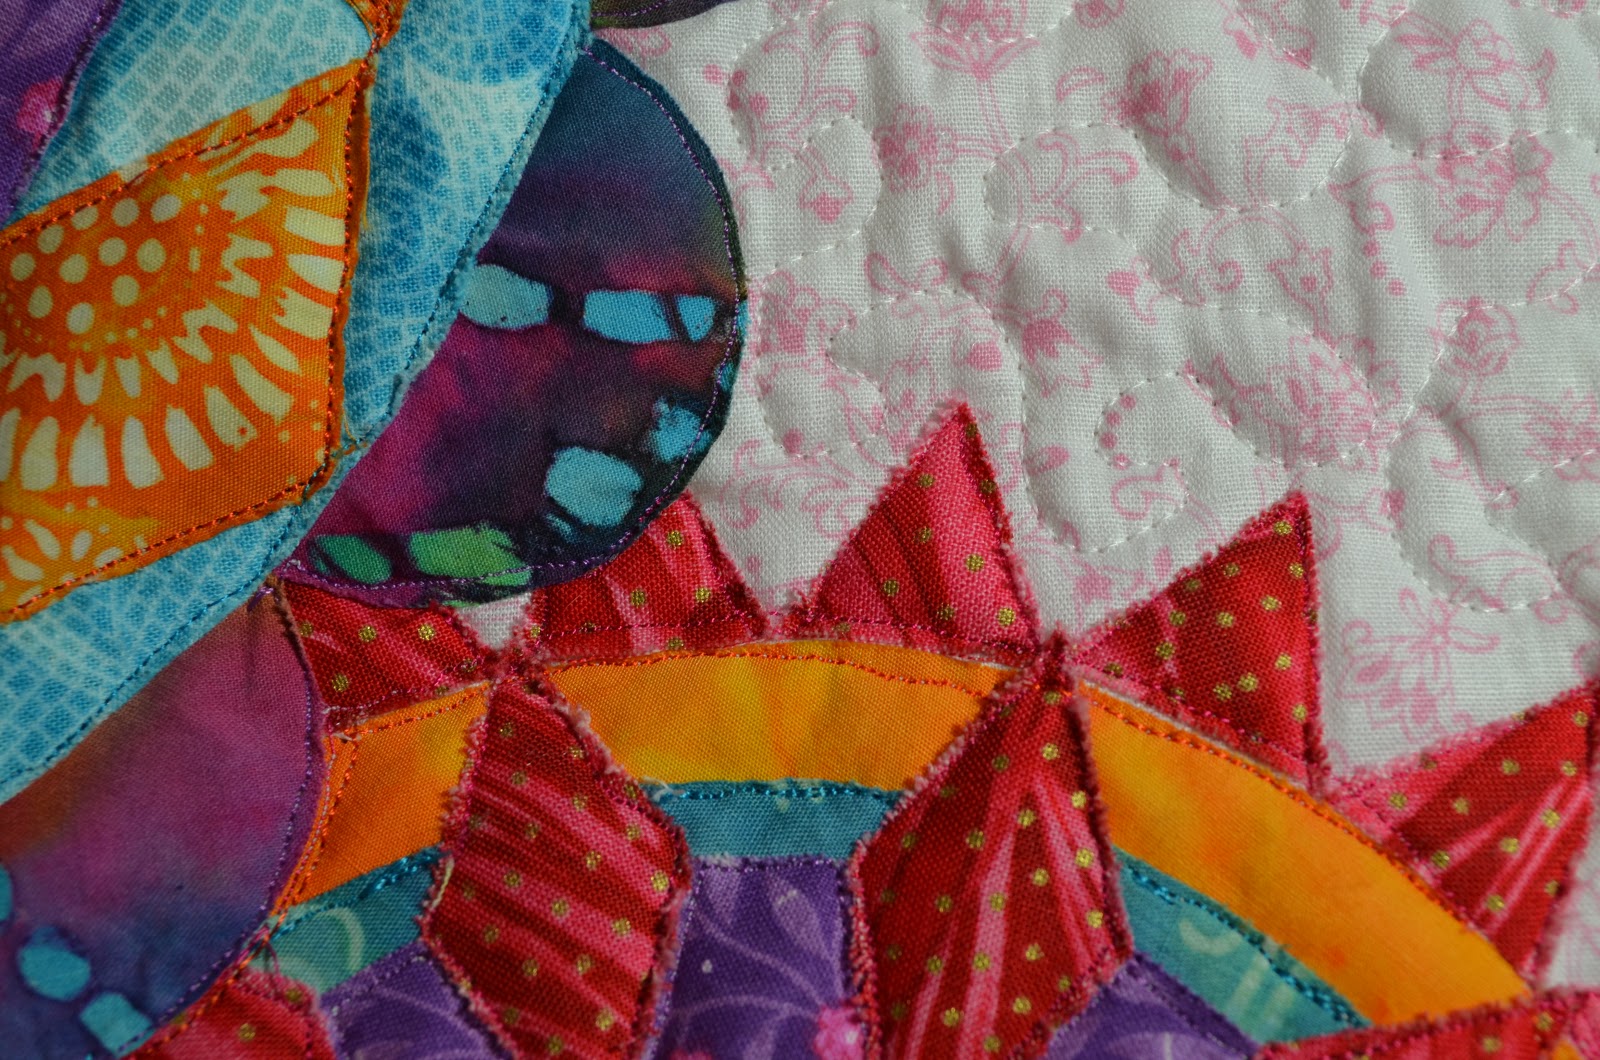
On the first quilt I did, I put the batting and backing layers together with the top and then stitched around each individual piece.  On the second one, I stitched around each piece before layering with batting and backing.  I'm not sure which is the "proper" method.  I only stitch over the pieces that have raw edges, if the piece is covered with another, I don't worry about it, notice that the blue stripe is stitched down on two edges, but the orange doesn't require it because it is overlapped with other pieces.


This picture shows how I jumped over the red diamonds while sewing on the green diamonds.  I came back and snipped the threads later.


When I was done outlining all of the raw edges, I quilted the background area.


This is a picture of the back, showing all of the quilting.


Pin It

Wednesday, 17 October 2012

Quick and Easy Vanity Stool Makeover

Pin It


Unlike most of the projects I've been  blogging about working on lately, I have only owned this piece for about a year, ha ha, how did it move up the list so quickly?  


It was time for a quick and easy project and this one fit the bill.


I couldn't tell if this was painted first white, and then gold, or if it was white and very greasy/dirty.  Regardless, after taking the cushion off I hit it with the pressure washer and then a wire brush and washed it again.


When it was dry, I sprayed it Rust-oleum gloss white.


I wrapped the seat in quilt batting.


Attaching it with staples and my electric stapler, I love this tool, so much easier than Manuel's old manual stapler.


I then repeated the process with the fabric, 


after centering it carefully of course.


It had only four screws, so putting it back together was a cinch.


I have set it up here with the pink vanity table, but I can picture it with an antique vanity, yeah, that project isn't done yet.  So many projects, so little time!


Pin It

Wednesday, 10 October 2012

Small Hutch Makeover

Pin It

This is another piece that I have had for many years, Johnny brought it home for me.  He obviously used to support my addiction to old furniture, not anymore!  
I decided it is finally time for me to do something with it.


I always knew there should have been legs on this, there is a strange bracket on the bottom.  We had to set it on a couple of foam puzzle pieces otherwise the bolts would have dug into the floor.  I saw a similar piece on Kijiji last winter and it had 60's type legs on it.


I had to pop the top off of the cabinet to remove the glass doors.
I originally was going to paint this black, but instead decided to go with gray.  I used wall paint that I bought to paint the livingroom, that project is still waiting. 


I adhered fabric to the back of the hutch with Mod Podge.  I also coated the fabric with Mod Podge.   


I put a coat of varathane on the hutch so that the stain wouldn't soak into the paint.  I antiqued the whole piece, including the fabric, with ebony stain.  The bottom to panels of fabric took the stain okay, but the top soaked up the stain in a couple of spots. 


I was just going to replace the top panel, but then decided to tear out all three and put new pieces in, I like it better clean white.


  I sprayed the hardware white. 


I added legs to the bottom, the type I had seen on the other cabinet I was telling you about.


Here it is set up with a few props. 


After all these years, it has finally been MacGIRLverized!

Sharing at


Pin It

Sunday, 7 October 2012

Cedar Chest Makeover

Pin It

I'm not sure what this is, maybe a hope chest, it is a piece that I have owned for many years.  The lid was split in two and the trim was off, but still there.  It was lined with cedar.


It had a top with a hinge, but I wanted it to open in the front so I had to knock it apart even more.  Eventually I had taken apart almost the whole box.


So besides the repairs that originally had to be done, I had to repair what I knocked apart myself :)


I knew that I wanted to add some sort of legs to this piece, but nothing was working for me.  I just couldn't find what I wanted.  I built a piece out of reclaimed wood but it just didn't go with the chest.  I looked through my "junk" pile, and through my son's "junk" pile, finally I found these balusters in my brother's "junk" pile.  I cut them down to size, cut holes in the bottom of the chest and attached them to the chest.  FINALLY!!! Something that worked.


I cut the front to size and attached it with a piano hinge.  I wanted a little more decoration on the front so I attached some wooden appliques that I had.


I cut a piece of laminated pine for a lower shelf, then painted the whole thing in Smoked Turquoise, and antiqued it with ebony stain.


I'm sharing at ...

Pin It
Related Posts Plugin for WordPress, Blogger...