Saturday, 15 February 2014

One Armed Bandit; Side Chair Makeover

Pin It


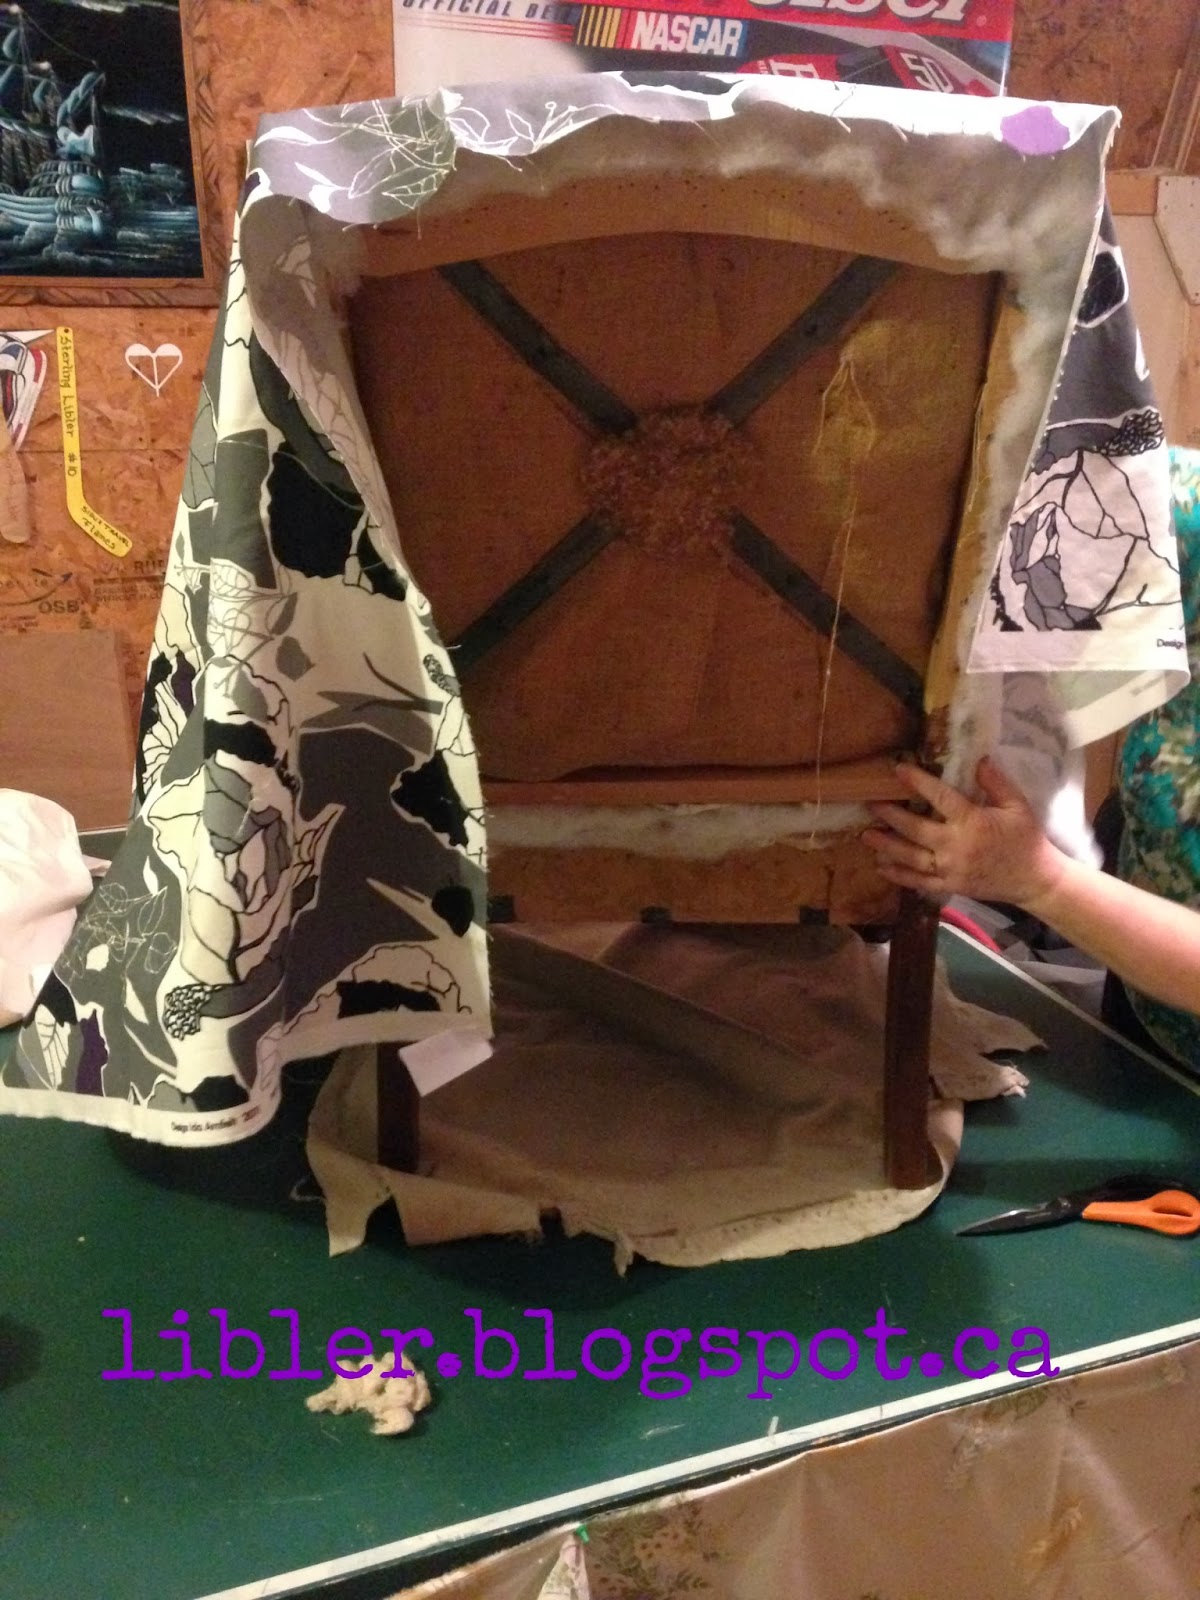
This poor old girl was in very good shape, a little blah, and the poor dear only had one arm.  She was very sturdy and definitely worth making over.  She was given to me because her owner was pretty sure I would see her worth.  She had been previously made over, and was done very well.


You can see by her insides that she is older than she looked.  Since I removed her other arm, I had to add support on the sides so that she won't loosen up and get wobbly.  You can see her original fabric right below my left hand.  It was sort of a gold brocade I think.


She looks likes she is getting younger every day!


I'm thinking about painting her legs, but for today, here she is.


How do you like her now?


Pin It

Wednesday, 12 February 2014

Vintage Window + Silhouette Cameo; Vintage window project.

Pin It

Last week while I was challenging myself to 3 pieces of furniture in 10 days I got sick.  Not terribly sick, but just sick, and so tired I didn't do much for 3 days.  Those of you who know me know that too
much down time drives me crazy, so during that time I made this little project.


The window is approximately 24" X 24"
I love this phrase!


Pin It

Sunday, 9 February 2014

Personal Challenge, Three Pieces of Furniture in 10 Days; Piece #3; Entrance Bench Makeover: I did it!!!

Pin It


I have challenged myself to makeover 3 pieces of furniture in 10 days.  Husband left on a holiday, youngest son left a couple of days later to meet up with him and older brothers, daughter lives out of town, this left me home alone.  Heaven!  Now let it be known, I love my family and  I don't want to live alone forever, but a week sounds great!


This is the first piece I tackled, but the last of the three that I finished. This is a fairly new piece for me, I've only had it since August, it kind of butted in line because of it's size.  I need it out of my way. In the above pic you see the top, and the next picture is the bottom.  I had done some filling earlier and it required sanding before I could prime.


I started by priming it with Zinser 123.  I actually liked this look.


I don't know what is going on with me lately, but I'm having such a hard time deciding what colour to paint things.  I was trying to choose between gray and white, and the next day started painting it turquoise, who knew?


After a couple of coats I antiqued it with black.  Once that dried I had to decide on a fabric for the seat. Decisions, decisions...
The mirror was broken, so I repaired that. I reupholstered the seat after taking several hours to decide on a fabric (seriously, it took me so long that I actually did another project in the meantime) and put it all back together.


 I guess it was worth all that indecision because I think I got it right. I love it, now I wonder why I doubted myself along the way.


Pin It

Saturday, 8 February 2014

Chaise Lounge Makeover; I'm Challenging Myself, 3 Pieces of Furniture in 10 Days; Piece #2

Pin It


My friend Laura found this piece, and had no room for it.  Yay, lucky me, I managed to sneak squeeze it into my stash.  I am trying to move some of my bigger pieces out of storage because I need room to work in my workshop.  I also felt like doing some upholstery, but not a hard one.


It looks like it's in good shape, but actually the edges were torn up.  Originally I planned to take the headrest part out and maybe add some armrests, but it would have been a big project so I decided to just go with it the way it was.


I tried out my new staple gun for the first time, it was pretty awesome.  I had a little problem with it jamming, but on the whole it was great.  Way better than my electric stapler, and I couldn't even go back to a manual stapler after this.


A picture of the new bottom before I turn it over to have a look at the top.


It was hard to get a good picture of it, this will have to do.


I'm happy with the way it turned out.  I might make some cushions for it.


Well, that's piece #2, third piece is almost done.  Tomorrow is really my last day to work on things, so I guess it was really a 9 day challenge.


Pin It

End Table Makeover; I'm Challenging Myself, 3 Pieces of Furniture in 10 Days; Piece #1

Pin It


I bought this little end table many years ago.  It looked like it was in great shape at the time, I didn't even have to refinish it.  Before long I found out that the seller had just sprayed it with some sort of finish, lacquer or varnish or something.  It wasn't long before it started to lift off.  Although I continued to use it, it has been a mess for a good many years.  The wood is nothing special, no beautiful grain, so I decided to paint it.


I easily sanded the varnish off the top, and just lightly sanded the legs.


I painted it with Zinser 123 primer.  I have to admit, I almost changed my mind and painted it white. But I had already decided to go bold, so I went ahead a stuck with the plan.


I hate washing paint brushes, so I have been known to brush as much paint out as possible and then just use it in a new colour.  That's what I did in this case, I knew that it was going to take a few coats anyway so I didn't see a problem with using my white brush in the red paint.  As hard as I work sometimes, I can be pretty lazy, ha ha.  It's definitely hot pink at the moment.


One more coat I and got the red that I wanted.
Now to antique it with a little black,
and voila, here it is, a quick little makeover.  My goal is 3 pieces of furniture in 10 days, we will see.


I shared this project at:

Primitive and Proper


Pin It

Monday, 27 January 2014

Vintage Trunk Makeover

Pin It
It appears as though this post just does not want to be written.  Last night I had most of it written out, and then I lost it, man I hate that!  This morning I was having a hard time getting the pictures to move down so that I could enter text, sheesh!  I hope that's the end of the troubles.
So this is what I was trying to tell you last night :)
Years ago I was banned from bringing any more treasures junk home.  Luckily, I have a short memory when it comes to some things.  This piece however, was not added to my stash in one of my forgetful moments, this piece was delivered by a friend, to my husband.  You see he can't say no to anybody but me!  Now, had the friend brought it to me I truly would have refused it, because it was in terrible shape, and  I didn't think it was worth getting in trouble over.  Luckily fate intervened and I ended up with it.
Notice that the lid is caved in, the wood where the hinges were attached was broken right out, and the inside was a mess, and smelled very musty.

                        
I turned the lid upside down on the floor and built supporting framework, slipped it inside and then stood on it to straighten out the top, then screwed it all down.  It worked, a nice flat top!


Each step of the project was a decision, I started by painting it white and sprayed the hardware silver, I had a few ideas about black and white bold designs, but I kept being pulled toward something a little more rustic.


I added some gray, now if my goal was to make an old trunk look pretty good, it would be done, but I wanted more that.


I decided to go with a Railroad theme.  My husband is retiring from the CNR after 35 years of riding the rails.  The names on the trunk represent some of the sidings between Sioux Lookout and Armstrong, Ontario.


I googled CNR emblems and picked this one that would have been in use when I was a kid.


This is a look at the back.


I stripped the paper off the inside, sanded, stained, and varathaned it.  Notice the supporting framework inside the lid, it should be good and sturdy now.  I also stained the outside so it was aged.  No more pristine white.  It is actually darker and dirtier looking in person.  It looks like it's been around a while.


I added a piece of wood where the hinges are attached because the old wood had broken out, therefore support was needed to re-attach them.  


In the end, I'm happy with it, and that, after all, is why I do this, if you like it too, that's a bonus!
Sharing at:

DIY Show Off
Read more at http://diyshowoff.com/buttons/#TIuCXLt3c7lHO44M.99


Pin It

Sunday, 8 December 2013

Cabbage Rolls; Croatian Style

Pin It


First, let me say that I call these Croatian style because I was taught how to make them by my Croatian husband's Great Aunt.  People from other countries may use a similar recipe, and other Croatians may use a different recipe.  The people that made me cabbage rolls when I was young were Ukrainian and theirs were made with rice and bacon, but no ground meat.
I started this post last year, took all the pictures and posted them, but never got around to doing the write up.  My niece just asked for this recipe so I thought I might as well finish off the post.  I usually just wing it when I make cabbage rolls, so don't worry about following the recipe exactly, because I never do, I will just try to figure it out as I write it down.

1 lb ground beef
1/2 lb ground pork
1 medium onion (chopped fine)
3 cloves garlic (or to taste, I have been using more)
1 T salt
6 sliced of bacon (cut up into fine pieces, pieces that are just pure fat I leave out)

mix all of the above ingredients together

1 1/2 cups of white rice (not minute rice)

pour rice into boiling water and cook for 10 minutes, drain
while hot spread rice over the meat mixture
mix into meat mixture, I do this with my hands, but be careful the rice is very hot

1 head of cabbage 


Remove the core from a cabbage and place cabbage in a large pot of boiling water.  As the leaves soften, remove them from the pot and set aside (I pull them off the head with a fork).  Continue until the whole cabbage has been cooked and removed from the water.  Some people prefer to freeze the cabbage rather than cooking it.  Freezing does make the cabbage pliable enough to roll, but I don't like the taste or texture of this method, again, you can try it and decide for yourself.
Some people prefer soured cabbage, you can buy this in the produce section of your grocery store.
Slice the thick vein from the cabbage leaves before rolling, don't cut it out completely, just thin it down to the same thickness of the leaf.


Form the hamburger mixture into a roll sized according to the size of the cabbage leaf.  I tend to make mine large.


Place on cabbage leaf and roll it up, tucking in the sides as you go.  The next several pictures show this step.


Take some of the smaller inside leaves, and some of the torn outer leaves and line the bottom of the pan.  These are absolutely edible, but in case of burning or sticking these should keep the rolls protected.


Layer the cabbage rolls into the pan.


Do as many layers as you need, just don't overfill the pan as you will be adding tomato juice and you don't want it to boil over.  Add at least a 48 oz can of tomato juice. My husband likes them with extra sauce so lately I have been adding either more tomato juice or some water.
I always add more salt at this point because I love salt.


Bake in 350 degree oven, probably 3 hours, covered.  I like the cabbage to be well cooked and limp.  You can judge for yourself how you like them.  The cabbage always take longer to cook than the meat . Mmmm.  Just seeing the photo below makes me wish these were coming out of the oven right now.
Enjoy!


Pin It
Related Posts Plugin for WordPress, Blogger...