Sunday 8 December 2013

Cabbage Rolls; Croatian Style

Pin It


First, let me say that I call these Croatian style because I was taught how to make them by my Croatian husband's Great Aunt.  People from other countries may use a similar recipe, and other Croatians may use a different recipe.  The people that made me cabbage rolls when I was young were Ukrainian and theirs were made with rice and bacon, but no ground meat.
I started this post last year, took all the pictures and posted them, but never got around to doing the write up.  My niece just asked for this recipe so I thought I might as well finish off the post.  I usually just wing it when I make cabbage rolls, so don't worry about following the recipe exactly, because I never do, I will just try to figure it out as I write it down.

1 lb ground beef
1/2 lb ground pork
1 medium onion (chopped fine)
3 cloves garlic (or to taste, I have been using more)
1 T salt
6 sliced of bacon (cut up into fine pieces, pieces that are just pure fat I leave out)

mix all of the above ingredients together

1 1/2 cups of white rice (not minute rice)

pour rice into boiling water and cook for 10 minutes, drain
while hot spread rice over the meat mixture
mix into meat mixture, I do this with my hands, but be careful the rice is very hot

1 head of cabbage 


Remove the core from a cabbage and place cabbage in a large pot of boiling water.  As the leaves soften, remove them from the pot and set aside (I pull them off the head with a fork).  Continue until the whole cabbage has been cooked and removed from the water.  Some people prefer to freeze the cabbage rather than cooking it.  Freezing does make the cabbage pliable enough to roll, but I don't like the taste or texture of this method, again, you can try it and decide for yourself.
Some people prefer soured cabbage, you can buy this in the produce section of your grocery store.
Slice the thick vein from the cabbage leaves before rolling, don't cut it out completely, just thin it down to the same thickness of the leaf.


Form the hamburger mixture into a roll sized according to the size of the cabbage leaf.  I tend to make mine large.


Place on cabbage leaf and roll it up, tucking in the sides as you go.  The next several pictures show this step.


Take some of the smaller inside leaves, and some of the torn outer leaves and line the bottom of the pan.  These are absolutely edible, but in case of burning or sticking these should keep the rolls protected.


Layer the cabbage rolls into the pan.


Do as many layers as you need, just don't overfill the pan as you will be adding tomato juice and you don't want it to boil over.  Add at least a 48 oz can of tomato juice. My husband likes them with extra sauce so lately I have been adding either more tomato juice or some water.
I always add more salt at this point because I love salt.


Bake in 350 degree oven, probably 3 hours, covered.  I like the cabbage to be well cooked and limp.  You can judge for yourself how you like them.  The cabbage always take longer to cook than the meat . Mmmm.  Just seeing the photo below makes me wish these were coming out of the oven right now.
Enjoy!


Pin It

Sunday 24 November 2013

Always Biting Off More Than I Can Chew; Part VII; Some Before And Afters

Pin It


Here are some before and afters, or in some cases before and durings :)

Porch


There was a smell in the porch, so I tore out the gyproc, the floor, and eventually tore down the ceiling.


Then I put it all back together again.


I whitewashed the walls,


and added a closet.  Unfortunately the closet doors will have to wait.


Oh, and don't forget about the floor.
I have since added the trim, but forgot to take a new pic.


Here is what the property looked like before,


and now!  The right side is done, the left side will have to wait until next year since we got a large dump of snow.


On to the bathroom.


Here is a panoramic of the bathroom part way through


Entrance from the outside.


Changed the light and the door.  I have trimmed the door too, but not when this was taken.


 Patchy flooring

 
 That's better


Loft before,


Panoramic of the loft, looks like a beehive, ha ha.  Sanded the logs and put new flooring down.


This is one of the bedrooms, just to show how much sawdust was produced in the sanding of the logs.


Right side stained, this was a big wall!


Attic full of squirrel nests, I never used to hate squirrels, now they are the enemy!


After I got the insulation cleaned out, but obviously before I put the new insulation in.  This was a big, messy, itchy job!


That's it for today.  I will post a few more later.

Pin It

Friday 22 November 2013

Antique Dresser Makeover

Pin It


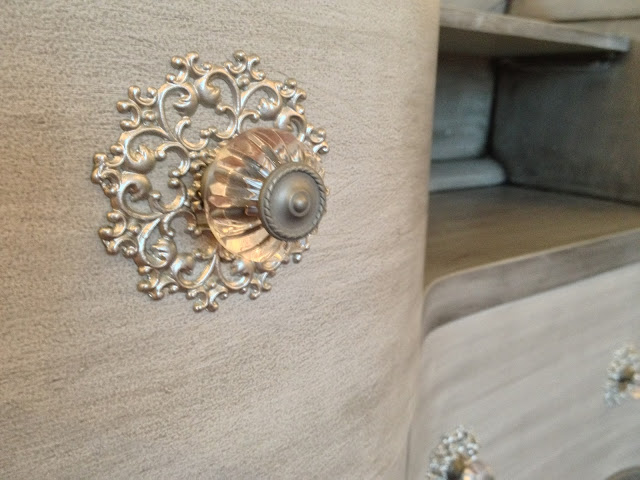
I can't believe I didn't take a before picture of this dresser. Well, what can I say, it was brown with a worn finish and the handles were dull and scratched brassy colour.  I did some sanding and priming.  In the picture below you can see the painted drawer on the left, and on the the drawer has been antiqued.  I love how the stain brings out the detail.


Here is the finished project. I spray painted the drawer pulls silver, although in this picture they kind of look white.


Pin It

Wednesday 13 November 2013

Reclaimed Wood Bathroom Vanity

Pin It

I needed a vanity for the bathroom of the log house.  I wanted it to be unique, but also didn't want it to be too big.  I was unsure which way I wanted to go with it, then suddenly I had a plumber lined up, and needed it stat!  I cut all the pieces and put about half of it together one evening, then finished it the next day while the plumber was working on the rest of the bathroom.  I put a piece of plexiglas on the top and on the shelf to make it practical.


I love vessel sinks, but I didn't want to spend a large amount of money on the tall taps that are used with them.  I built the vanity with a step shelf at the back to make the tap higher. (I saw this done on somebody's blog but then couldn't find it again or I would link to it.)  There is no point getting a good deal on a sink if you have to pay way too much for the tap.


There is a crawl space under the cabin so the plumber put a straight pipe down through the floor and put the trap under the floor, making the lower shelf more usable.


Don't the logs looks great!  I do love this vanity, this is why I do all this hard work, so that I have total control of the decor.  I know I should have dressed it up with towels and props, but I couldn't wait to share!


Pin It

Tuesday 3 September 2013

Two Tone Vanity; Antique Vanity Makeover

Pin It


My fabulous daughter found this vanity at a yard sale.  She sent me a picture and I said "Absolutely!!!"  She is such an awesome woman!  Not the greatest picture, but they took it apart to send it to me and I didn't put it together again until it was finished, so it is the only one I have.  It needed some TLC, the veneer was chipped a little here and there, and it was very dark.  A couple of drawers had come apart and had to be fixed.


 Here is a sneak peek of the finished product.


And a little more...  


Okay, I won't keep you waiting!


I do believe I'm in love, again.


Pin It
Related Posts Plugin for WordPress, Blogger...